How to Wire an Electric Fence?
Electric fencing is a great way to protect your garden, cattle pen or other property. A fence keeps potential trespassers out and keeps any animals safely enclosed in a fenced area. However, your electric fence will only be effective if it is installed correctly – in fact, an incorrect installation can be very dangerous for anyone who sets foot near your fence.
GET ELECTRIC WIRE AT LOW WHOLESALE PRICE
Tips For Wiring Up An Electric Fence
The first part of any construction project is drawing up the plans. Draw the layout of the fence lines. Determine how many support corners you need to accommodate your area. Then, figure out what kind of charger you'll need, what kind of wire you plan to use, how much fence you'll need, and how many fence posts you'll need. Remember that fence posts should be 8-12 feet apart throughout your perimeter, so it's important to make sure you plan properly.
Next, make sure you have all the tools you need to complete the installation. For this project, your tool list should include electric fence wire, insulators, distribution boxes, fence posts, grounding posts, clamps, plastic hooks or loops, post digger or shovel, sledgehammer, wire cutters, protective gloves. Finally, the final step in the prep process is to dig holes for the ground and corner posts. Prepare your space and simplify the installation process with a backhole digger.
Tuqiu Technology would like to share some tips of know about electric fence wiring.
Planning the layout
The first thing you should do is sort out exactly what size fence you need. If you are setting up the fence to house animals, what kind of animals and how many? This is important to determine how much fencing you will need. Once you know how much space you are using, your layout should be easy to put together. In addition to length, don't forget to consider the height of the fence.
Determine the number of support corners
For each corner and door in your fence, you will need to add a support. Supports help strengthen and reinforce the area on the fence that will be under the most pressure. It also protects them from damage if something hits your fence.
The number of supports needed for each corner post depends on the height of the fence. If you use six or fewer wires, only one brace is needed. But if you have seven or more, you should plan to add a second one.
Setting up the charger
Next, find a safe place (away from the outside world) where you can install your charger. If you're using an electric charger, you'll need to place it near an AC outlet, while a solar charger will need a weatherproof area with plenty of sunlight. Set up the charger according to the manufacturer's instructions, but do not open the charger until the enclosure is fully installed.
Install a grounding post
Grounding posts are important because they help stabilize your electric fence. Every electric fence needs a grounding post that is at least 6 feet long, but we recommend having at least two grounding posts about 10 feet apart.
To place the grounding posts, place them in a pre-digged hole in the fence line. Use a sledgehammer to drive it down until only two inches are visible from the top, then install the second post (if you plan to have one).
Install the ground wire
The grounding wire should lead from the grounded end of the charger to each ground post. Make sure the wire is taut, then secure it to the post with a grounding clip. This will provide a safe way to discharge the fence if there is any excess power build up.
Installing the fence post
Once your grounding posts and wires are in place, you can begin installing your fence posts. Space the posts 8-12 feet apart, making sure that at least ⅓ of the post's length is underground. Then, install your support corners to make the fence more stable.
Installing supports on corners and gates
Early in the planning stage, you determined how many corner supports you will need. Now that you have your posts set up, you will install the braces.
Installing Insulators
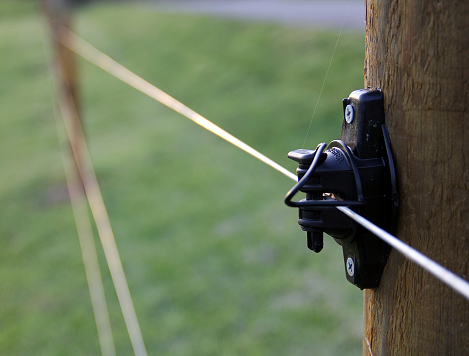
With an electric fence, you want to make sure the power flows through the wires, not the posts. That's why it's important to install an insulator to keep the current inside the wire fence. Attach it to the post according to the manufacturer's instructions (and make sure you get the right insulator for the type of wire fence you're using).
Laying the wire
Now it's finally time to pull the wire. Start with the fence post furthest from the charger and hang the wire along each post. Hang the wire as you see fit - just make sure the wire is tight (but not so tight that it breaks) and secure it to your post with connector clips.

Test the wiring
Your wire fence is now ready for testing. Simply turn on the charger and check the unconnected voltage with a voltmeter (it should be between 6,000 and 10,000 volts).
Next, charge the wiring. With the charger off, use a jumper cable to connect the wiring to the charger. Then turn the charger back on and check the voltage on the line furthest from the charger. You will notice a slight drop in voltage, but this should not exceed 2,000 volts.
Testing your wiring is critical to the care and maintenance of your electric fence. Make sure you schedule daily checks and write down your voltage results so that you can easily spot sharp drops (which indicate a short circuit).


评论
发表评论